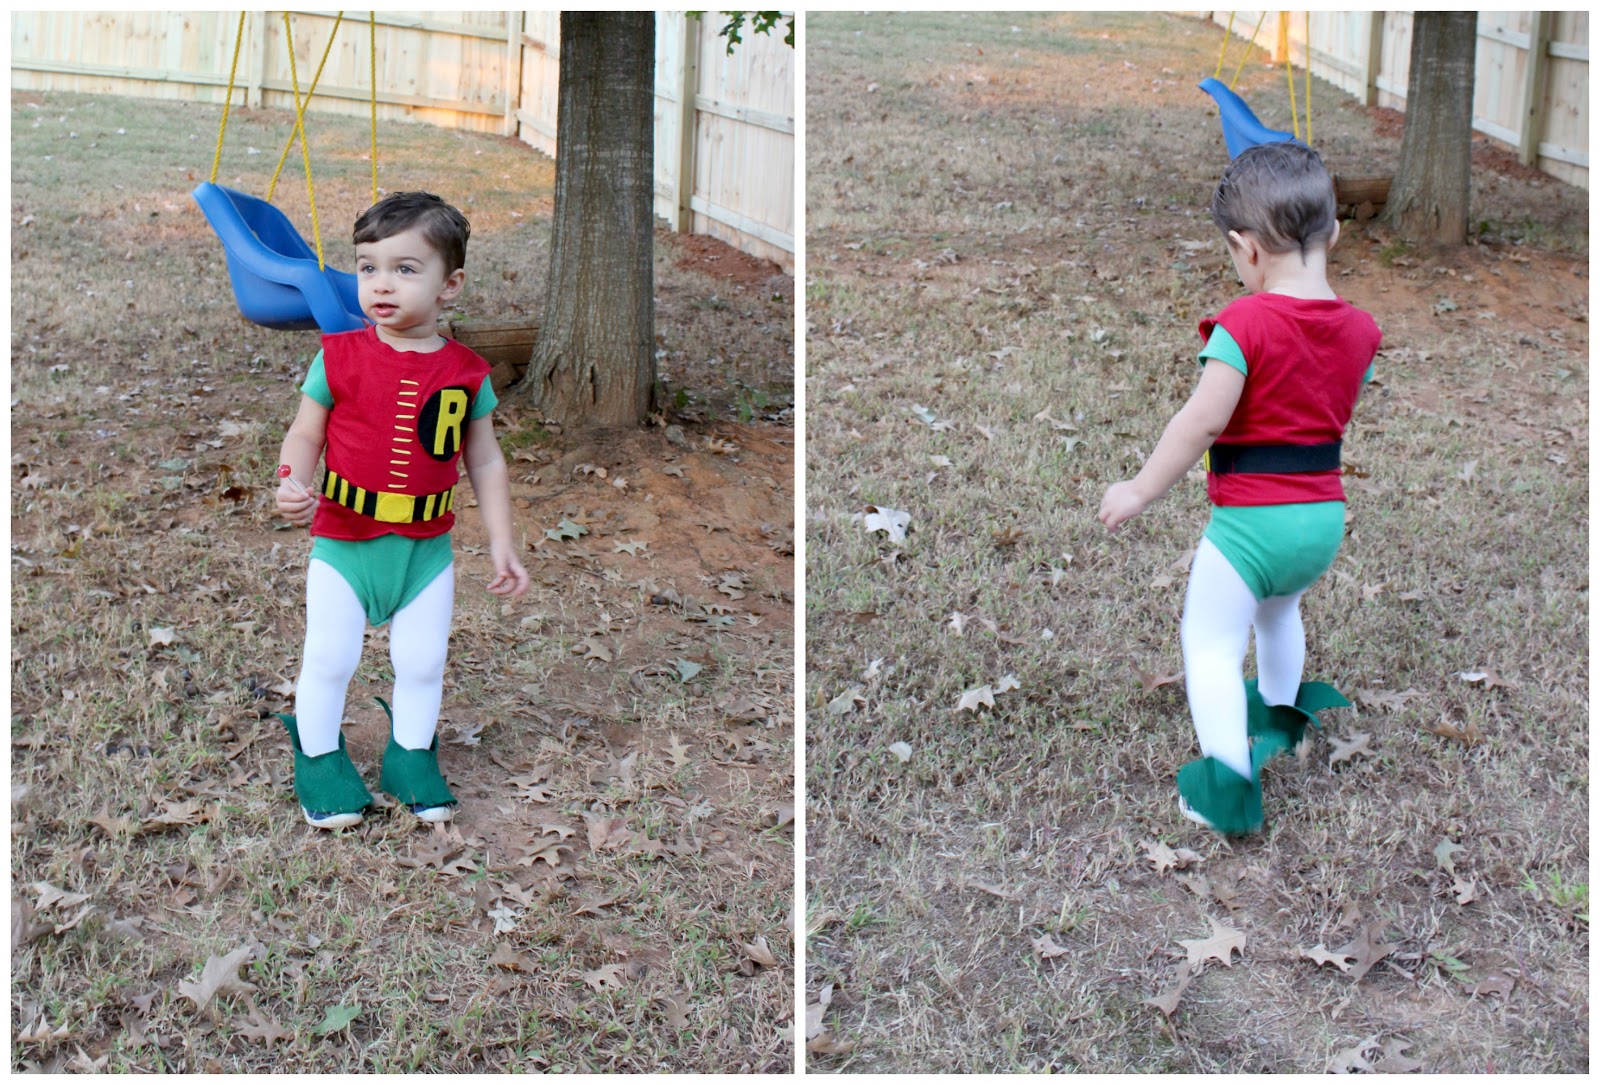
Sami was only 18 months old last Halloween, so he had no clue what was going on of course. Honestly, I wasn't even going to dress him up in a costume until my dad mentioned he already had a Batman costume for himself....that got me thinking that Sami could be his sidekick - Robin!
I did not want to spend a lot of money on a costume, but I was also excited to get creative & DIY his costume like we usually did as kids. My parents always helped us make our costumes when we were little & I have great memories of that process (again, not that Sami has a clue it's Halloween, but it made for some cute photos!).
First, I had to decide which "Robin" costume I was going to try & recreate. Even though my dad's Batman costume was a modern version of Batman, I ended up making the original Robin costume that Burt Ward portrayed in the 60's:
After looking at some old photos, I realized that it actually wouldn't be too difficult to recreate. This is a really cute & fairly easy costume to make for your toddler! Here's how I did it....
After looking at some old photos, I realized that it actually wouldn't be too difficult to recreate. This is a really cute & fairly easy costume to make for your toddler! Here's how I did it....
MATERIALS:
-yellow men's button down shirt
-green onsie
-red t-shirt or long sleeve shirt
-white tights
-black, yellow, & green felt
-yellow ribbon (optional)
-fabric glue or hot glue
I bought the yellow men's shirt, red shirt, & green onsie from Goodwill. Unfortunately, the green Goodwill onsie turned out to be too small. Luckily, I remembered that I actually already had a green onsie that I had just packed away in Sami's "too small" clothes bin...so it was just big enough to fit him:
Obviously the green onsie is already good to go - you don't need to do anything to it except use it as reference to cut the red vest to size. Just cut the arms & bottom off the red shirt, then round the bottom of the shirt like so:
To make the cape, I took the men's shirt & buttoned the top button. Then I just started cutting away excess fabric. I didn't have a pattern to follow obviously, so I just continued cutting little by little until I got the shape I wanted. Before I cut the bottom of the shirt, I tried it on Sami first to find the best length for him:
The shoe covers were a total trial & error experiment. I started by cutting out two triangle-ish pieces of paper & just kept repositioning them around Sami's shoes until they fit okay. Once I got the general shape, I went back & trimmed down the "wings" on each side until it looked most the like the original photos. Once I was happy with the paper templates, I used them to trace out my cuts onto the green felt. I used glue to attach each side of the shoe covers. Then I just slipped the covers onto his shoes (I did add a little tape underneath to keep it in place, but nothing permanent):
Lastly, I made a little black eye mask out of more felt. Again, no template to follow - I just sort of played around with it. I thought about painting an eye mask on, but Sami has such sensitive skin I worried about a reaction or the possibility of him rubbing it in his eyes. Depending on your child's personality & age they may not wear the eye mask at all either - this is the one element of the costume that Sami would not keep on. I got a couple photos of him with the mask, but that was it:
I ran out of time to make my own costume last year, so I just threw on some black clothes & made a little cat ears headband by gluing black felt ears to a headband - possibly the easiest & laziest version of Catwoman ever?

If you decide to make this original Robin costume for your little one, please send me a photo of the finished product - I would love to see! Thanks for reading & Happy (early) Halloween!
Mel
:)


No comments:
Post a Comment