Duo Ventures

Wednesday, September 4, 2013

How to Hide Your Water Heater: IKEA KVARTAL System

Update 8/26/15:  We've received a couple of comments in regards to this solution being a potential fire hazard or fire code violation.  We did not initially take this into consideration as the curtains never actually touched the water heater.  However, as one reader mentioned, there may be minimum clearance requirements within your insurance policies & fire codes.  We recommend that you research your local fire codes before implementing this system just in case.
**********************************************

The water heater - it’s necessary, but not very attractive to look at.  Our water heater happens to be located in the corner of our laundry room which is very spatially challenged.  As a result, we had to think of a creative way to disguise it without taking up a lot of space (and we needed to be able to access it easily if needed).

One day while we were browsing @ IKEA we saw a curtain track that can be mounted from the ceiling……sold!
We spent a few minutes (OK, maybe more like 30 minutes) figuring out which pieces we would need to buy.  IKEA can be confusing @ times, no?

We began by installing the ceiling fixture pieces.  First, we removed the bottom pieces from the ceiling fixtures:


TIP:  There are no screws or anchors included - so make sure you buy some anchors/fasteners that will work for your ceiling  

We decided to go with a toggle bolt - just to be sure it stayed put.  After we removed the bottom piece, we inserted the screws through the fixture like this:
We drilled pilot holes into the ceiling & then attached the anchors to the ceiling.

Next, we put together the tracks together using the connector pieces.  (Remember, we had already slid all of the bottom pieces from the ceiling fixtures into the tracks):

Next, we slid all of the white plastic gliders onto the tracks & then attached the end pieces:
The track portion is ready to go!
    
Then we simply attached the track portion to the ceiling fixtures by using the small Allen wrench.  We did not take any pictures @ this point - but here's a photo from IKEA which illustrates this step:


After Mel ironed the window panels, we began to attach the drapery clips.  We did not use the white plastic hooks that came with the gilders.  Instead, we bought a pack of the stainless steel RIKTIG curtain hooks with clips:

We ended up buying the window panels from IKEA as well.  They are 98” tab top panels - we got them extra long so that we could hem them to the perfect length (which, thus far, still hasn't happened).  We obviously didn't utilize the tab tops - they are just folded back behind the panels:
Before & After: 
Thus far, we haven’t had any issues with the gliders getting stuck – it works great!
It's a super easy & affordable way to hide your water heater! 


Nader & Mel

:)

Saturday, May 4, 2013

DIY: Homemade Laundry Detergent


We're definitely not the most green/organic/all natural household out there by any means, but we have made minor adjustments here & there.  A couple of years ago we switched from the generic scented laundry detergent to one that was fragrance & dye free.  While I initially missed the scent of fresh laundry, I felt like all those extra chemicals that were used to perfume & color the detergent were ultimately not necessary.  

Then recently, I started seeing some DIY detergent recipes on Pinterest that seemed even more natural & more cost efficient.  There are many different ways to make your own laundry detergent, but most recipes seemed to use the same basic ingredients with the combinations & quantity of ingredients varying only slightly. 

I essentially chose the ingredients I liked best & made my own version.  Pinterest led me to two blogs that I referenced the most: Happy Money Saver & A Diamond in the Stuff.  So thanks to you ladies! :)

Some recipes called for 2 or 3 bars of either Ivory, Fels-Naptha, or Zote soap.  I couldn't decide, so I just went with 1 bar of Ivory & 1 bar of Fels-Naptha.  I also noticed most recipes called for the regular Oxiclean, but while I was shopping I noticed they offered a version that was free of dyes, perfumes, & chlorine...so I went with that instead.

Here's my version of DIY Laundry Detergent:
-borax: one box (4 lb)
-baking soda: one box (4 lb)
-washing soda: one box (3 lb 7 oz) 
-oxiclean: one container (3 lb)
-fels-naptha bar soap: one bar (5.5 oz)
-ivory bar soap: one bar (4 oz)

OK, so here's what you need to get started:

I started by grating the soap onto some tinfoil, using the second largest slot.  It came out looking like finely shredded cheese - tacos anyone?  Some people use a food processor to get a finer consistency, but the grater worked OK for me:

Next, I mixed everything together in a large bucket & once everything was incorporated thoroughly I transferred it all into a 2 gallon glass jar.  I also bought a stainless steel coffee scoop which is 2 Tbls (the recommended amount per load is 1 or 2 Tbls depending on the load size):

That's it! It's that easy.
With all the ingredients added, it filled about 3/4 of the jar as you can see.   There is a small amount of fragrance in the soaps, which I was initially hoping to eliminate completely, but it's such a trace amount per load that I don't think it should matter too much.

I literally just made this batch a couple of days ago, so I've yet to wash anything except for a load of white sheets, but it seemed to work great so far!  Most of the reviews I've read were awesome too.

Cost Breakdown:
-borax: $3.38
-baking soda: $2.24
-washing soda: $3.24
-oxiclean: $7.52
-fels-naptha bar soap: $.97
-ivory bar soap: I already had some @ home
-glass jar: $9.97
-stainless steel scoop: $ 1.67
Total cost for approximately 15 lb of detergent:  $17.35 

I normally pay around $12 for my regular detergent, but I have a feeling this is going to last me much longer since you only need 1 or 2 Tbls per load.  I'll be back with an update once I do a few more loads - Happy Washing!

Side Notes:
We happen to have an archaic hand-me-down washing machine from my parents, but these ingredients are safe for those of you with High Efficiency washing machines too.

Also, our DIY version is fragrance free.  While we don't mind the absence of frangrance, I would recommend adding a scented laundry enhancer (like Purex Crystals for example) for those of you who prefer that 'clean laundry smell'.   Other than that, we plan on DIY-ing more laundry detergent when we run out of this batch!

Update:  We have been using our DIY laundry detergent for about 4 months so far.  It has been working great for us - clothes come out nice & clean.  That being said, our clothes are typically not heavily soiled/stained.  It's just the two of us right now - no kids or pets, so I don't know if that would be a game changer at all  ;)


Mel
:)

Friday, August 17, 2012

Laundry Room Makeover


We'll have to blame this room re-do on the Container Store - we this photo in their catalog & it gave us just the inspiration we needed for a little revamp of our own.  We had been trying to reconfigure our storage/organization system in our laundry room, but just couldn't commit to a plan until we saw that photo.

Unfortunately, we do not have an 'original' before shot of our laundry room due to the fact that we were so excited to get started & forgot to snap a before photo for reference purposes.  However, we think you'll get the idea from the picture below.

Imagine this room with the addition of a fixed wire shelving unit across the back wall, a bronze flush mount light fixture (AKA: boob light), & ugly linoleum flooring (Mel's dad helped us install some peel & stick floor tiles last year):
So you get the idea.  Not cute or functional.  Our water heater is also conveniently located in our laundry room.  Also not so cute:

|paint & shelves|
First thing we did was paint the entire room using some leftover paint from our stairway & upstairs hallway - Smooth Stone by Glidden.  After the paint completely dried, we installed an adjustable rail system from Home Depot.

FYI- there is a top 'hang track' piece that helps with keeping it level as you install - we opted not to buy it, but we would recommend that you DO purchase it to make things easier:

We decided to go with solid white shelves (as opposed to the wire ventilated shelves- like in our inspiration photo) because we felt that storage containers would slide on & off more easily.  To maximize our storage space, we wrapped the shelving around the room in an 'L' shape:


We also needed an area that we could hang dry certain clothing items, so we added this bar which works awesome:

|new lighting|
There are no windows in our laundry room - which means we do not have ample natural light & the existing light just wasn't cutting it.  So, we swapped it out for a new square fixture that we got on clearance @ Lowe's (see the 'before' photo above). 

Unfortunately, it simply wasn't giving off enough light - so we moved it to our foyer & replaced it with the Alang ceiling fixture from IKEA.  For more details on that, you can check out our photo tutorial: how to install Ikea Alang Ceiling Lamp:

|buh-bye water heater|
Next, we had to figure out a way to hide that ugly water heater.  While we were @ IKEA, we saw the KVARTAL ceiling mounted curtain track system which we thought would be the perfect solution.

Luckily, it did work out perfectly!

Side Note: We've received a couple of comments in regards to this solution being a potential fire hazard or fire code violation.  We did not initially take this into consideration as the curtains never actually touch the water heater.  However, as one reader mentioned, there may be minimum clearance requirements within your insurance policies & fire codes.  We recommend that you research your local fire codes before implementing this system just in case.

It's nice that we can hide it away, but can still access it if needed.
(Click here to see how we installed the IKEA KVARTAL track)


|the details|
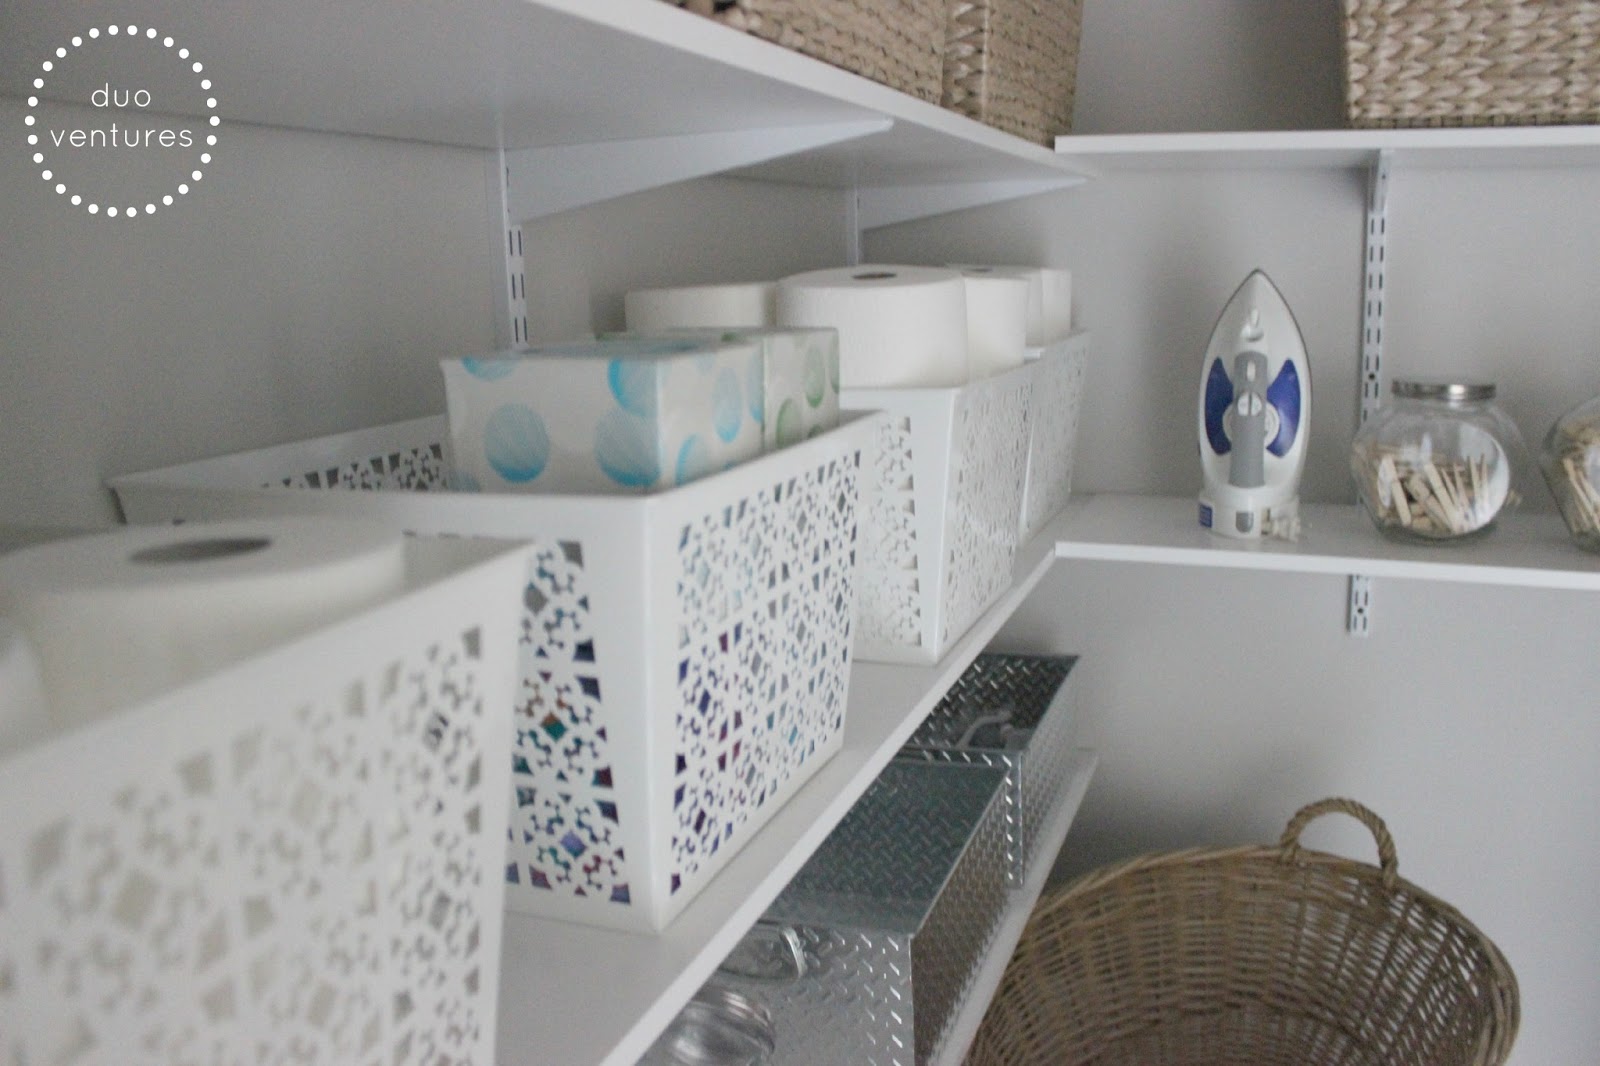
We picked up a bunch of storage bins, baskets, & jars from Garden Ridge.  All of our extra paper products (towels, TP, tissue) are stored in the white metal bins.  We also keep other miscellaneous items (heating pad, beach stuff, etc) tucked away in the baskets:

Mel also found this metal laundry hanger @ Hobby Lobby & thought it would work perfectly to store our mini ironing board:

The color wasn't quite we we were going for - but nothing a few coats of white spray paint couldn't fix:

Next, we used some over-the-door shoe organizers to store all of our cleaners on the back of the door.  These things are awesome - they allow you to utilize a frequently underused area of your home AND they free up space underneath the sink:

And finally, a couple of glass jars work great to hold our DIY laundry detergent, clothes pins, & loose change:


|future plans|
Eventually, we would like to upgrade to a front load washer/dryer set.  Our plan is to build a washer/dryer stand so that we can store the laundry baskets underneath, as our floor space is limited.

A little Before & After action:
What an improvement, right?  Now it's functional, organized, & pretty!  

Happy washing, drying, & folding!

Mel & Nader